Watch My Bangin’ Brow Makeover (and Learn How to Do One Yourself)
Typically, if I wanted Kayla Parks to do my eyebrows, I would have to get in line. “I don’t even want to think about how many brows I’ve done,” she said. “We normally have a team of 16 artists at our trade shows, and there’s a two-hour wait.”
Kayla is a trade-show rock star (unlike me—once, I got lost at one) because she’s the national trainer for Chella, a skincare company focused on eyebrow and eyelash maintenance. Whether she’s at a crazy-crowded show or teaching a merchant how to use Chella products, Kayla is happy to point out the importance of a well-filled brow. “People don’t realize how much they frame the face,” she said, and I have to agree, especially after watching her work her magic on my friends Katie and Jackie, who’s already tested a couple products out with me.
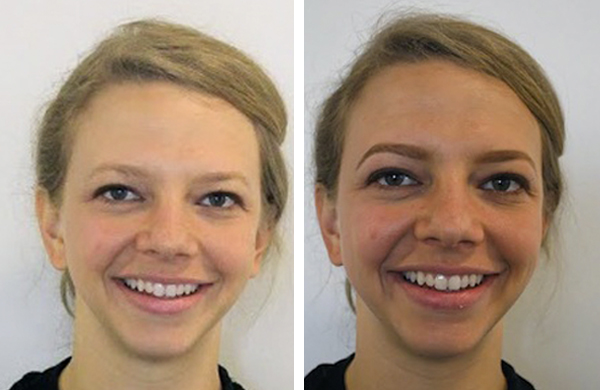
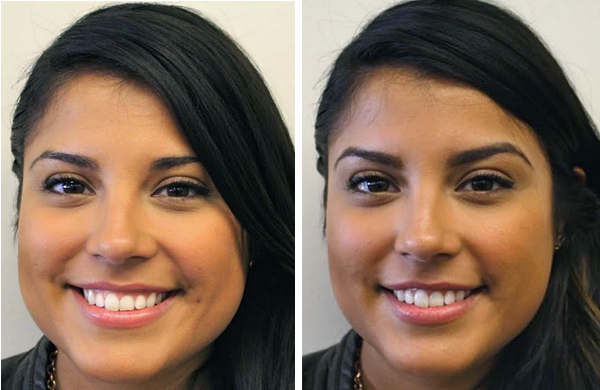
I was stunned by the difference an expert brow artist can make. I couldn’t wait to have my brows done, too! Watch the video below to see Kayla’s step-by-step process in action on yours truly:
These same tools that Kayla used on my brows are occasionally available on Goods. Browse the cosmetics section to check availability. These sell out fast!
Want to know more? Here are some tips and trivia from Kayla about each tool.
Eyebrow Razor: It’s Not Just for Brows (or Ladies)
This tiny razor gets rid of stray brow hairs and peach fuzz. You can use it anywhere on your face! Kayla said that it’s a better, gentler alternative to waxing or threading, both of which involve pulling your skin—a practice that can lead to fine lines. Dudes might find the razor helpful for detail work, too. “Guys love [the razor],” Kayla said, “because they cry whenever they get waxed, threaded, or tweezed.”
Scissors: They’re Sharp!
These scissors have safety edges so that you don’t cut your skin, but they’re still incredibly sharp. Kayla uses them to snip brow hairs and to trim down facial prosthetics when she’s doing special-effects makeup. “They cut through anything,” she said.
Tweezers: For Now or Later
You don’t have to tweeze until after you’ve filled your brow. That way, you can see where the outlying hairs are and remove them more efficiently.
Another tip: when you’re tweezing your brows, be mindful of your nose. “We have a nerve right here in our brow that triggers us to sneeze,” Kayla noted.
Stencils: Don’t Stress About Them
If you’re going to use stencils, don’t let them rule your life. They’re a guideline, not a template for perfection, and you’ll never get both brows to look identical. (Kayla told me to remember that “brows are sisters, not twins.”)
As an aside, I have an embarrassing admission: when I saw Kayla’s stencils, I thought, Oh no, she only brought brow stencils for one side of my face. Turns out, you just flip them over to use them on the other brow. Duh. She reassured me that this was a common mistake: “People call us and say ‘I only got one set.’ It happens all the time.”
(These stencils don’t come with the kits on Goods, but you can purchase them separately here.)
Brow Pencil: Two Is Better Than One
“I always use two colors, because nobody has one color in their hair.” Kayla said. Blending two shades lends your brow more of a natural look. Kayla recommends alternating between your brows as you fill—doing both of your arches right in a row, both of your tails in a row, etc. “That way, you can get a little more even.” (Kayla does one whole brow after the other, though, because she’s a pro.)
Eyebrow-Defining Gel: What Holds It All Together
If you’re the type of person who rubs their eyes a lot, you might worry about mussing up your madeover brows. Enter this gel. It keeps the hairs in place, and it goes on completely clear.
Highlighter: Don’t Skip It!
Highlighting around your brows is more than a fun exercise in mini-contouring. It’s what polishes the look and really makes your brows pop. “It’s so important, and so many people skip it,” Kayla said. Like the razor, Chella’s highlighter can be used anywhere on the face. It’s the perfect finishing step!
Photos by Mahreen Younus, Groupon
Deals in wichita

Deals in wichita Other Deals in wichita